Last updated: November 01, 2026
Key Takeaways
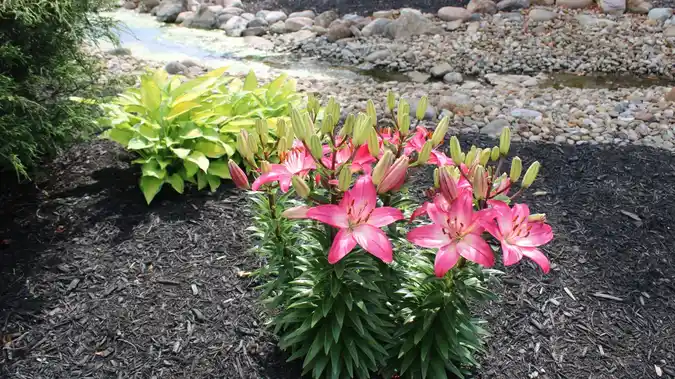
- A neat bed still needs a low, open mulch ring so the shrub can establish quickly.
- Keep moisture on the roots, not against the stem.
- The first week matters, so the ring should work right away, not just look tidy.
- Choose mulch for airflow, water movement, and breakdown speed, not just its label.
Quick Answer
How to Mulch Around New Shrubs After Planting: water the shrub, spread a 2- to 3-inch mulch ring over the root zone, and keep mulch 2 to 3 inches away from the trunk.
New shrubs need a clean mulch ring after planting, not a pile against the stem. How to Mulch Around New Shrubs After Planting is simple: mulch should sit over the root zone, stay off the trunk, and help the soil hold water without staying soggy. The steps below settle where it goes, how much to use, and what to do in the first season.
Mulch the new shrub the right way on day one
Picture this: you’ve just finished planting a new shrub, the root ball is backfilled, and the soil has already started to settle a little after watering. You want the bed to look finished, but you also need the plant to establish fast without trouble around the stem.
Start with a light, even ring of mulch. If the soil has settled after planting, water first, then mulch. If the planting hole is still soft and airy, wait until it firms up after the first soak.
-
Water the shrub until the root zone is moist.
That settles the soil around the root ball and shows you where low spots have formed. -
Rake the surface smooth with a hand rake.
This removes clumps and keeps the ring even instead of lumpy. -
Spread mulch in a broad circle around the shrub.
Keep the material over the root zone, not just right at the base. -
Leave clear space around the trunk.
The stem should stay visible, with no mulch touching the bark. -
Check the edge of the ring after the first watering.
If the mulch shifts, pull it back into a flat layer.
A new planting needs this simple setup more than a decorative mound. The goal is moisture control, not a piled-up bed edge. For the broader approach, see mulch application and bed care and how to prepare planting beds.
How close can mulch go to a new shrub?
How close can mulch go to a new shrub?
Picture this: you’ve got the mulch bag open, the bed is ready, and the only question left is how near the material can sit to the plant without causing trouble. You want to protect the roots, but you do not want to trap moisture against the stem.
Keep mulch away from the trunk. The ring can cover the soil around the root ball, but the base of the shrub needs open air and a visible stem line.
- Leave a clear gap around the trunk so the mulch does not touch the bark.
- Extend the ring outward over the root zone rather than building a cone at the center.
- Flatten the surface instead of mounding it like a volcano.
- Recheck after rain, since settling soil can pull mulch inward.
A wide, low ring usually helps the new shrub more than a tight, deep collar. When mulch presses against bark, the bark stays damp longer. That makes the base harder to dry out after watering and can invite rot or pest problems. On the other hand, a broad ring gives the roots a steadier moisture buffer. For more detail on trunk protection, see mulch and tree trunk care and watering newly planted shrubs.
Step-by-step: build the mulch ring around the root ball
Picture this: you’re standing over the planting hole with a bag of bark, compost, or wood chips, and you need a repeatable way to finish the job. The plant is young, the soil is still loose, and the ring has to work on the first week, not just look neat.
Use a shallow, even layer. Spread it to cover the root zone, then stop before it crowds the stem.
-
Measure the spread of the shrub’s root zone with your eye or a tape.
The mulch should cover the area where roots are exploring, not only the planting hole. -
Place mulch in a thin layer around the shrub.
Start beyond the trunk and work outward so the center stays open. -
Level the surface with your hand or rake.
Flat mulch sheds water more evenly than a bumpy mound. -
Press the outer edge lightly into the soil.
This keeps it from washing downhill during the first storm. -
Inspect the trunk clearance from all sides.
If mulch is touching the bark anywhere, pull it back right away.
A common mistake is thinking the finished bed should look full and thick on day one. That leads to buried stems, trapped moisture, and a heavy layer that can slow air movement at the surface. A lighter application is easier to maintain, and it still does the job of cooling the soil and slowing evaporation.
- Good sign: the stem is visible all the way around.
- Good sign: the ring is wide, not piled high.
- Bad sign: the material slopes steeply toward the trunk.
What kind of mulch works best for a newly planted shrub?
What kind of mulch works best for a newly planted shrub?
Picture this: you’re at the store or the pile in the yard, and the choices range from shredded bark to wood chips to fine compost. The plant does not care about the label as much as it cares about airflow, water behavior, and how fast the material breaks down.
Choose a mulch that stays open and does not mat down hard. Coarse organic material usually fits new shrubs better than a dense, fine layer that seals the surface.
A few practical options:
- Shredded bark holds together well and gives a tidy finish.
- Wood chips often last longer and resist washing away.
- Leaf mold or compost can help improve the surface, but it can also compact faster if spread too thickly.
- Pine straw works in some beds because it is light and easy to move back from the stem.
The trade-off is simple. Finer material looks smoother, but it can crust over and hold too much moisture at the top. Coarser pieces let water move through and air move around the crown. That matters in the first season, when the shrub is trying to anchor into the surrounding soil. See types of organic mulch and how mulch affects soil moisture.
How much mulch around a newly planted shrub?
How much mulch around a newly planted shrub?
Picture this: you’ve spread the ring, and now you’re guessing whether it’s enough or too much. The answer matters because a thin layer dries out quickly, while a heavy one can stay wet and block air from reaching the soil surface.
Use enough to cover the soil, but not enough to bury the base. The ring should look finished and protective, not stuffed to the top.
A good first-season layout is straightforward:
- Cover the exposed soil around the shrub.
- Keep the trunk clear.
- Keep the surface even.
- Refresh only when the layer has broken down or blown away.
Do not build the layer higher just to make the bed look polished. That can hide settling problems for a week or two, then turn into a damp collar around the stem. A better move is to fix the soil grade first, then keep the surface low and open. That helps water soak into the root zone instead of running off the slope of a mound. For a general range, the University of Minnesota Extension recommends 2 to 3 inches of mulch, kept a few inches from stems and trunks. See UMN Extension on mulching trees and shrubs.
The truth is, a new shrub benefits more from consistency than from bulk. Watering matters more than a thick blanket, and the best mulch job supports that watering pattern rather than fighting it. A 2- to 3-inch layer is usually enough for new plantings.
First season care after mulching a new shrub
Picture this: the shrub is planted, the mulch is in place, and now you need to keep it healthy through the first months instead of only on planting day. The ring will settle, the soil will move, and the bed will need small adjustments as the roots spread.
Check the mulch after every watering and after heavy rain. The first season is about small corrections, not one perfect finish that never changes.
Use this routine:
-
Inspect the trunk line once a week.
Pull mulch back if it has crept inward. -
Watch for settling soil around the root ball.
If a shallow dip forms, add soil to level the bed before adding more mulch. -
Refresh the ring only when the layer gets thin.
Old mulch should be topped off, not buried under a huge new layer. -
Keep the watering pattern steady.
Mulch helps the soil hold moisture, but it does not replace watering. -
Clear weeds before they root deep.
A fresh mulch ring works best when the bed stays open.
A new shrub can look fine while its roots are still adjusting below ground. That is why the first season is about discipline, not decoration. If the plant wilts, the fix is usually water timing, soil settling, or root stress—not another heavy blanket on top.
For broader bed care, the mulch application and bed care hub is the right next stop.
Common mistakes that hurt a new shrub fast
Picture this: the planting looks neat from the sidewalk, but the shrub starts to struggle because the mulch job solved the wrong problem. Most failures come from a few simple habits that seem helpful at first and backfire later.
The biggest mistake is burying the stem. The second is using too much material in a small ring.
Watch for these errors:
- Mulch touching the trunk: keeps bark damp and can lead to decay.
- A steep mound: traps water near the base instead of spreading it out.
- A thin dusting only: dries too fast and does little for the root zone.
- Packing mulch hard: blocks air and makes watering less effective.
- Ignoring settled soil: leaves roots exposed or creates low spots that hold water.
A broad ring with clear trunk space beats a neat-looking mound every time. If the bed was planted into heavy soil, the risk is even higher because water lingers longer. In that case, keep the ring flatter and watch drainage closely during the first few weeks.
Should a new shrub be mulched right away?
Yes, a new shrub can be mulched right away after planting, as long as the soil has been watered and the stem stays clear. The first watering settles the root ball and shows where the surface has dropped. After that, a light, even ring helps hold moisture in the root zone. If the planting hole is still shifting, wait until the soil firms up, then finish the ring.
How much mulch around a newly planted shrub?
Use enough mulch to cover the soil around the root zone without building a thick mound. The ring should be broad and low, with the trunk left open to air. If the mulch starts to look like a hill, it’s too much for a first-season shrub. A flat ring is easier to manage and less likely to hold moisture against the bark.
How close can mulch go to a new shrub?
Mulch should not touch the trunk of a new shrub. Leave a visible gap around the stem so air can reach the base and moisture does not stay trapped against the bark. The mulch can spread across the surrounding soil and over the root zone, but the center should stay open. That small space makes a big difference in first-season care.
Drafted with AI; not yet reviewed by a person.
Leave a Reply