Last updated: November 01, 2026
Quick Answer: The most useful mulch application method for most beds is a 2- to 4-inch layer spread on weed-free soil and kept off stems, trunks, and crowns. In practice, the exact method depends on bed size, plant spacing, and cleanup needs, so the right choice is the one that fits the bed rather than one fixed rule. Mulch Application Methods and Bed Care is the practical question this guide answers.
Mulch works best when it is spread at the right depth, kept off stems, and renewed before it turns thin, crusted, or matted. The right method is usually a 2- to 4-inch layer, applied on weed-free soil and pulled back from trunks and crowns. The steps below settle how to spread it, how much to use, and how to keep a bed healthy all season.
Key Takeaways
- A mulch bed fails most often from too much depth, not too little.
- Bare soil is not the goal; a clear ring around stems is.
- Fine mulch, shredded bark, wood chips, and straw all behave differently.
- Water the bed first if the soil is dusty or packed down.
- Top-dress thin areas instead of piling fresh mulch over old mats.
- Edging and weeding matter as much as the mulch itself.
- If mulch stays wet against trunks or crowns, the plant loses.
- The cleanest beds are the ones that are checked every few weeks.
Why mulch application method matters more than mulch type
Picture this: you’ve bought a truckload of mulch, and the bed still looks messy because it was spread unevenly, piled against stems, and put on top of weeds. The fix is not a different bag; it’s a better application method and better bed care.
The truth is, mulch does three jobs at once: it slows evaporation, blocks light from weeds, and buffers soil temperature. If the layer is wrong, those benefits shrink fast. A 2- to 4-inch layer is the standard starting point for most landscape beds; deeper than that, roots can struggle for air and water can run off instead of soaking in.
According to the U.S. Environmental Protection Agency, mulching helps conserve soil moisture and suppress weeds, but only when it is used correctly. The U.S. National Arboretum and other extension services also advise keeping mulch away from stems and trunks to reduce decay risk. In other words, the way you apply mulch matters as much as the material itself.
Here’s the catch: mulch is not a blanket you tuck everywhere. You want coverage over the soil, not against the plant. Keep mulch a few inches back from tree trunks, shrub stems, and perennial crowns, especially on young plants where moisture builds up fast.
A simple field rule helps:
- Use 2 inches for fine mulch or heavy soils.
- Use 3 inches for most shredded bark and wood chips.
- Use up to 4 inches only where the existing layer is thin and the bed drains well.
- Pull mulch back from any trunk flare or crown you can see.
How do you apply mulch the right way?
The right way is to clear, water, edge, spread, and finish with a gap around the plant base. That sequence keeps mulch from forming a crust and keeps the bed from turning into a weed mat.
Start with the bed itself. Pull weeds, remove sticks and trash, and break apart any compacted crust. If the soil is dusty and dry, water it first. Mulch on dry, hard soil can shed water instead of helping it move down.
Then spread mulch by hand, with a rake, or with a wheelbarrow and shovel. Work in light passes, not one giant dump. A thin first pass gives you control; a second pass lets you correct low spots. For trees and shrubs, shape the surface so it gently slopes away from the stem rather than rising like a volcano.
Follow this order:
- Weed the bed.
- Water the soil if it is very dry.
- Rake the old mulch loose if it is crusted.
- Add mulch in a thin layer.
- Check depth with your fingers or a small ruler.
- Pull mulch back from stems, trunks, and crowns.
- Water lightly if dust is flying.
That last step is often missed. A light rinse settles loose mulch and helps it knit together without washing it into a slab.
Which mulch spreading method fits your bed?

The best spreading method depends on bed size, plant spacing, and how much cleanup the area needs first. Hand spreading wins in tight beds. A wheelbarrow and rake win on long borders. A blower or machine works only when the surface is already clean and even.
Hand spreading is the most precise. It takes longer, but it lets you control depth around roses, perennials, and new shrubs. It also keeps mulch from burying low foliage. For a small front bed or a garden island, this is often the safest choice when plants are crowded or newly planted.
A shovel and rake are better for long runs of shrubs or foundation beds. Dump small piles every few feet, then rake them out to a measured depth. This keeps the layer even and avoids ridges that dry at different rates.
Bulk mulch from a truck or trailer is efficient, but it can create thick piles that get too deep before you notice. A common mistake is to dump everything in one spot and “spread it later.” That usually leaves one area buried and another nearly bare.
Use this quick fit guide:
- Hand spread: small beds, new plantings, tight corners
- Shovel and rake: medium beds, long borders, foundation lines
- Wheelbarrow drops: larger beds with good access
- Machine or blower: broad commercial beds, only after cleanup
How deep should mulch be in beds?
Most beds do best at 2 to 4 inches deep, with the lower end for fine-textured material and the higher end for coarse chips or bark. That depth gives you weed suppression without smothering roots.
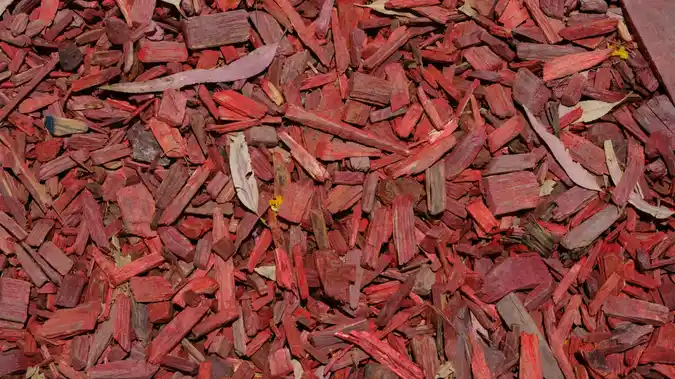
The type of mulch changes how that depth behaves. Fine mulch packs down faster. Coarse chips leave more air space and often need a little more depth to cover the soil evenly. Shredded bark sits somewhere in between and tends to stay put better on slopes.
Depth should be checked in several places, not just one. Beds often drift deeper near edges, walkways, and places where extra mulch was dumped from a wheelbarrow. A quick check with a trowel will show if the layer is uniform or if it has hidden drifts.
Watch for these common depth errors:
- Less than 2 inches: weeds push through fast.
- More than 4 inches: roots can sit in a wet, air-poor layer.
- Piled on slopes: mulch slides and leaves bare patches.
- Heaped against stems: rot and pest problems become more likely.
You do not need perfect depth every inch of the bed. You need a reasonable average, with the plant bases kept open.
Why are mulch rings and open crowns non-negotiable?
Mulch rings are non-negotiable because direct contact with stems, trunks, and crowns traps moisture where plants do not want it. A clear ring also makes it easier to spot rot, insects, and vole damage.
For trees, keep mulch off the trunk flare so the base can dry. For shrubs, leave a small open gap around each stem cluster. For perennials, do not bury the crown at all; the crown needs air and visible space, especially after rain.
This matters more on young plants and on species with thin bark. It also matters in shaded beds, where soil dries slowly. A wet collar of mulch is a common setup for bark decay and hidden insect activity.
A good bed edge looks neat and readable:
- You can see the trunk flare.
- You can see the base of each shrub.
- The mulch stops before touching stems.
- The soil surface is covered, but the plant base is not buried.
If the bed already has mulch volcanoes, pull the material back by hand. Do not just flatten it. Flattened mulch still touches the trunk.
What bed care keeps mulch working all season?
Bed care keeps mulch effective by stopping weeds, breaking crusts, and fixing thin or matted spots before they spread. A mulch bed is not a one-time task; it needs quick checks every few weeks during the growing season.
The first job is weed control. Small weeds pull easily from fresh mulch. Big weeds send roots through the layer and make the bed look neglected. Pull them while the soil is damp if possible. Dry, compacted roots break and regrow.
The second job is to keep the surface loose enough to breathe. Rain and foot traffic can pack mulch into a hard skin. Lightly rake the top inch in places where water beads up or runs off. Do not churn the whole bed. You only need to open the surface.
Use this maintenance routine:
- Pull weeds before they seed.
- Rake matted spots.
- Top-dress thin areas.
- Recheck the gap around stems.
- Remove leaves, sticks, and trash.
- Watch for fungus, ants, or lingering wet spots.
On the flip side, over-tending can damage roots. Deep raking near shrubs and perennials can cut feeder roots close to the surface. Keep the rake shallow and work only where the mulch itself is crusted.
A seasonal check is helpful, but it is not a substitute for diagnosing plant decline. If you see repeated wet spots, dieback, or root damage, consult a local extension office or certified arborist rather than assuming mulch alone is the cause.
Should you refresh, replace, or remove old mulch?
Refresh old mulch when the layer is thin or faded, replace it when it has broken down into a heavy mat, and remove it when it has become sour, packed, or contaminated. That decision saves time and keeps the bed from getting too deep year after year.
Freshening a bed is usually enough when the old mulch is still loose and you can still see soil in places. Add a thin top layer and level it out. If the mulch is still performing but just looks tired, this is the simplest fix.
Replace it when the old material has turned into a dense blanket that no longer breaks apart easily. A thick mat can shed water and trap fine roots. In that case, pull some of it back before adding new mulch.
Remove mulch entirely when:
- The bed has become too deep over time.
- The material is moldy, sour, or packed tight.
- The surface is full of roots, weeds, or debris.
- You need to reset grading around plants or edging.
A full removal is more work, but it gives you a clean start. That matters in older beds where layer after layer has built up for years.
What mulch method works best on slopes, trees, and perennials?
The best method changes with the bed shape and the plants in it. Slopes need anchoring. Trees need open trunks. Perennials need light coverage and a clear crown.
On slopes, use coarser mulch and spread it in thin passes. Fine mulch slides downhill faster and tends to collect at the bottom edge. If the slope is steep, reduce the depth slightly and keep the surface textured so it grips better.
Around trees, shape the mulch into a flat or gently sloped ring that stops well before the trunk. The goal is to cover the root zone, not mound material on the bark. A ring that widens outward is better than a cone.
Around perennials, wait until the soil is warm and the plants are established before adding mulch. Leave the crown exposed. A thick pile right over the center of the plant can hold moisture where tender growth starts.
Use these fit-for-place rules:
- Slopes: coarse mulch, thin passes, light raking
- Trees: broad ring, open trunk flare, no mound
- Shrubs: even depth, gap at stem bases
- Perennials: light layer, crown left open
- New plantings: hold mulch back farther than usual
When is mulch the wrong choice?
Mulch is the wrong choice when the bed needs drainage correction, root-zone repair, or a full reset of buried stems and compacted soil. In those cases, adding more material only hides the problem.
If water pools after rain, mulch will not fix the grade. If the soil is hard as brick, you may need to loosen or amend it before any surface cover helps. If roots are already exposed or girdled, the bed needs correction before new mulch goes down.
It is also the wrong tool in a few narrow cases:
- Newly graded soil that still needs settling
- Beds with chronic standing water
- Areas with buried root flares or too much old mulch
- Spots where rodents nest under thick cover
- Plantings that need bare soil for reseeding or self-sown plants
Mulch is a finish layer, not a repair for bad soil structure. If the bed is failing below the surface, address that first.
The verdict: which method gives the best bed care?
Choose hand spreading if the bed is small, crowded, or full of perennials. Choose a shovel-and-rake method if the bed is long, open, and needs a uniform 2- to 4-inch layer. Neither works well if the bed has drainage problems, buried crowns, or mulch already built too deep.
That is the clearest rule I can give. Hand work is slower but safer around delicate plants. Raking is faster on large borders and gives you better depth control than dumping mulch in piles. The wrong choice is to use speed as the main goal. Speed is how beds get volcanoes, mats, and rot.
The practical decision looks like this:
- Choose hand spreading if plants are tight together and the stems matter.
- Choose shovel and rake if the bed is broad and you can see the soil clearly.
- Choose removal first if the old mulch is matted, sour, or already too deep.
- Skip mulch for now if the bed has standing water or buried plant bases.
Common mistakes that ruin a good mulch job
A mulch bed can look finished and still fail. The most common failures come from depth, timing, and cleanup, not from the mulch material itself.
The top mistakes are easy to spot once you know them:
- Spreading mulch over weeds instead of removing them.
- Piling mulch against trunks and stems.
- Letting the layer get deeper every season.
- Ignoring compacted or water-repelling spots.
- Using fine mulch where wind or slope will move it fast.
- Leaving old matted mulch in place under a fresh top layer.
A quick seasonal check prevents most of these. Run your hand across the bed edge, look at the plant bases, and measure the depth in a few places. That takes less than a minute and catches the problems that matter.
FAQ
How often should mulch be refreshed?
Refresh mulch when the layer falls below about 2 inches in the areas that matter most, or when the surface starts to look bare and weedy. Many beds need only a light top-up, not a full replacement. If the mulch has matted into a dense layer, loosen or remove some of it first.
Can I put new mulch on top of old mulch?
Yes, but only if the old layer is still loose and not too deep. If the bed already has several inches of settled mulch, adding more can bury stems and reduce air flow. Break up the old layer, check the depth, and keep the final total in the normal range.
Is shredded bark better than wood chips?
Shredded bark is better when you want the mulch to stay put and look finished in a formal bed. Wood chips are better when you want a coarser, longer-lasting cover with more air space. Neither is perfect for every bed; slopes, small perennials, and tree rings each favor different textures.
Should I water after mulching?
Yes, a light watering helps settle the layer and reduces dust. You do not need to soak the bed unless the soil beneath is dry. Watering after application is especially useful when the mulch was spread in dry, windy weather.
Why does mulch turn crusty or sour?
Mulch turns crusty when fine particles pack together and shed water. It turns sour when it stays wet, low in oxygen, and mixed with decaying debris. Raking the top layer, thinning the bed, and improving drainage usually help more than adding another fresh layer.
Drafted with AI; not yet reviewed by a person.
Leave a Reply