Last updated: November 01, 2026
Key Takeaways
- Mulch for pollinator gardens should protect soil without sealing it off.
- Light coverage helps because many native plants reseed at the surface, and many pollinator beds need open ground.
- Coarse wood chips, shredded leaves, and partial leaf litter are the most habitat-friendly options here.
- For most pollinator beds, 1 to 2 inches is enough, and less is often better around seedlings and self-seeding natives.
Quick Answer
Use about 1 to 2 inches of coarse mulch in most pollinator beds, and keep it thinner around seedlings and direct-sown natives. That approach fits How to Choose Mulch for Pollinator Beds and Native Plantings without sealing the soil or burying new growth.
Mulch for pollinator gardens should be light, loose, and thin so bees, butterflies, and native seedlings can still use the bed. The safest choice is usually a coarse, low-smother cover that leaves some soil and leaf litter exposed. The sections below sort out what to use, what to avoid, and how to keep habitat value intact.
What mulch should do in a pollinator bed
Mulch for pollinator gardens should protect soil without sealing it off. If the bed is meant for bees, butterflies, and native plantings, the cover needs to be light enough to let stems emerge and leaves still find the light. A thick layer that looks tidy can do the wrong job.
Picture this: you’re standing over a fresh native bed in spring, with tiny shoots, bare gaps, and a few spent stems from last year. You want coverage, but you do not want a blanket. A 1- to 2-inch layer is usually the working range for light cover in habitat plantings.
- Coarse wood chips break down slowly.
- Shredded leaves mimic forest floor conditions.
- Straw can blow around and mat down.
- Compost is too rich for many natives if used as a blanket.
The goal is not a showroom finish. It is a surface that keeps moisture even, softens splash, and still leaves room for seedlings and ground-nesting insects. That is why a thick bark product with tight packing is a poor match for most pollinator beds.
Here’s the catch: the right mulch depends on whether the bed is a fresh planting, a seeded meadow, or an established patch with stems left for winter. A single answer does not fit all three.
Why light coverage beats a deep blanket
Light coverage wins because many native plants reseed on the soil surface, and many pollinator beds depend on open ground, not sealed ground. Too much cover can block that process fast. If you want a bed that keeps working for years, think “filter” instead of “lid.”
Picture this: you’re trying to keep soil from crusting after rain, but you still want a little bare earth for bees and volunteer seedlings. That is the balance. Bare patches of 10% to 30% of the bed are often useful in habitat-focused plantings, especially where ground nesting matters.
- Start with the plant list. If the bed includes direct-sown natives, use the thinnest cover you can manage.
- Check stem habit. Plants that emerge late in spring need open gaps, not a dense mat.
- Match the surface to the site. On slopes, coarse pieces stay put better than fine material.
- Leave some soil exposed on purpose. A few open inches are habitat, not neglect.
- Recheck after heavy rain. If the layer has compacted into a crust, rake it open.
The balance matters because soil surface conditions affect both emergence and nesting. For example, the Xerces Society notes that many native bees nest in bare or lightly vegetated ground, which is one reason open patches can matter in habitat plantings. Source: Xerces Society, Create Habitat for Native Bees.
A light layer also makes it easier to see where new growth appears. That matters in the first season, when a bed is still settling in and you do not want to smother tiny plants by accident.
Which mulch materials fit habitat gardens?
The best mulch materials for habitat gardens are coarse wood chips, shredded leaves, and partial leaf litter. Those options support a looser surface and keep the bed from looking sealed shut. Fine bark, dyed wood, and heavy compost are usually the wrong fit when habitat value matters more than a polished finish.
Picture this: you’re choosing between a bagged, dark decorative product and a loose pile of arborist chips. The second one usually works better for pollinator beds because it is less uniform, less dense, and more like the litter layer many native plants expect. Leaf litter and 2- to 4-inch chips are common habitat-friendly choices because they leave air spaces.
- Wood chips: good for paths and larger beds; coarse texture keeps gaps open.
- Shredded leaves: useful where native plants already drop leaves of their own.
- Whole leaves: best when they stay loose, not packed into a wet mat.
- Pine needles: can work in some native plantings, but they are not the first choice for every site.
The truth is, the “best” material is often the one that looks the least manicured, but it is still wise to check the planting and local conditions or consult a professional if you are unsure. A habitat garden does not need a uniform topcoat. It needs a surface that behaves like living ground cover, not plastic sheeting.
For material comparisons, the USDA Forest Service has guidance on mulch functions and breakdown rates in landscape settings: Mulch. For broader habitat context, see native plant maintenance.
How much mulch should you put down?
For most pollinator beds, 1 to 2 inches is enough, and less is often better around seedlings and self-seeding natives. Deep layers can bury small plants, hide emerging shoots, and keep seed from reaching soil. If the bed is already rich in leaf litter, you may need only a thin touch.
Picture this: you’re spreading material around little clumps of goldenrod, asters, and milkweed. Those stems need room to rise. A thin layer lets you cover the open soil without swallowing the bed. Never make the first pass look “finished” if the planting is still young.
A simple order of operations works best:
- Clear out thick mats, sticks, and weeds first so you can see the soil surface.
- Spread the material in a loose layer, aiming for about 1 inch in seed-heavy or young beds.
- Keep the cover thinner near crowns and stems, especially where seedlings are just starting.
- Leave visible openings where native seed is supposed to fall and stay in contact with soil.
- Check after rain or wind, then rake back any drifted piles that cover new growth.
A deep layer costs you more than appearance. It can delay emergence, make the bed cooler and wetter than the plants want, and hide problems until they spread. If you want more weed suppression, this is not the right page to force that answer. Habitat comes first here.
To compare bed strategies by season, see spring garden cleanup and how to mulch native perennials.
What to leave exposed on purpose
You should leave some ground open on purpose, because a pollinator bed is not meant to be sealed from stem to soil. Bare earth, thin leaf cover, and standing stems all have a job. Bees use some open ground for nesting, and native seedlings often need direct contact with soil to settle in.
Picture this: you’re in late fall, and last season’s stems are still standing. You might be tempted to chop everything down and cover every inch. Don’t. Standing stems, open patches, and leaf litter can all serve habitat roles at the same time.
- Leave a few inches of open soil where reseeding is part of the plan.
- Keep some stems upright through winter if the planting supports them.
- Let leaf litter stay in pockets instead of raking it into one even layer.
- Avoid burying crown zones where new growth has to push through in spring.
Now, you might be wondering if this means the bed should look messy. A little, yes. That is the trade-off. A habitat bed should look lived-in, not clipped into a uniform mat. If you want a space that reads as polished first and ecological second, this is the wrong choice.
For broader habitat upkeep, our native pollinator plant list and habitat gardening basics can help.
Common mulch mistakes in native plantings
The biggest mistake is treating a pollinator bed like a decorative border. That usually leads to heavy coverage, tight packing, and buried seedlings. A second mistake is using fine material that mats after rain. Both choices can turn a breathable surface into a crust.
Picture this: you’re one month into spring, and the bed still looks neat. Then you notice no new shoots in half the area. Often the problem is not the plants. It is the cover. A thick, flat layer can shut down emergence fast, especially around direct-sown natives.
- Packing mulch against stems traps moisture and can weaken crowns.
- Using too much compost can feed weeds and make the bed richer than many natives want.
- Covering every open spot removes the bare soil bees may need.
- Letting leaves mat down after rain can block light and air.
- Refreshing too often can bury young plants by inches over a few seasons.
Here’s the catch: a tidy bed can still fail as habitat. The better rule is to check the planting itself, not just the top layer. If seedlings are struggling to emerge, the cover is probably doing too much.
For a broader look at materials and use cases, the hub on mulch types and materials can help you compare options without turning this page into a general catalog.
A simple rule for different planting stages
New seedings need the lightest cover, while established native beds can handle a bit more, as long as the surface stays loose. That is the rule that keeps most pollinator plantings from getting buried. The younger the planting, the more open the surface should be.
Picture this: you’re planning for a bed this season, not last season. A fresh sowing, a first-year plug bed, and a mature planting all want different treatment. Fresh seed beds usually need the least cover because seed and soil need contact, not insulation.
- Freshly sown native seed: keep cover very thin or use none where seed must touch soil.
- First-year plugs: use a light layer between plants, not over them.
- Established habitat beds: use thin, spotty cover and preserve open ground.
- Beds with lots of leaf drop: manage the litter already present before adding more.
Once the bed matures, you can often reduce added material. Native plantings do not need constant topdressing if the site already generates enough leaf litter and plant debris. That is a habitat win and a labor win.
What pollinator beds should look like after mulching
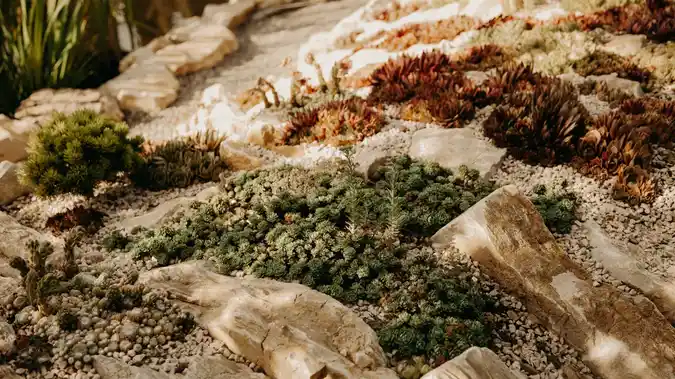
A pollinator bed should still look like a habitat, not a painted surface. You should see stems, gaps, and a textured floor. If the bed looks sealed, smooth, and evenly dark from edge to edge, it probably has too much cover for pollinator use.
Picture this: you’re scanning the bed from standing height. You can still see soil in places, leaf fragments in others, and stems rising through it. That is the right picture. A mixed surface with visible openings tells you the bed can still function for bees and native seedlings.
If the bed stays too bare, it may dry too fast or erode. If it stays too covered, it can stop reseeding and hide emerging growth. The balance is the point. For most pollinator gardens, that means choosing the least aggressive cover that still holds moisture and tempers weeds.
For additional guidance on habitat design, see the pollinator garden design and native plant maintenance pages.
FAQ
Should pollinator beds be mulched heavily?
No, pollinator beds should not be mulched heavily. A deep layer can block native seedlings, reduce open soil, and cover habitat features like leaf litter and bare patches. A thin, loose layer is usually a better fit for bees and butterflies than a thick blanket.
Can mulch block native plant reseeding?
Yes, mulch can block native plant reseeding if it is too thick or too fine. Seed often needs direct contact with soil, and a heavy cover can stop that. Keep the layer light in seeding areas and leave some soil exposed where new plants are meant to come in.
What mulch is best for habitat gardens?
The best mulch for habitat gardens is usually coarse wood chips, shredded leaves, or natural leaf litter. Those choices stay loose, support air spaces, and fit the low-disturbance look many native plantings need. Avoid anything that mats hard or forms a sealed surface.
Should I remove leaf litter from a native bed?
Not always. Leaf litter often belongs in a native bed because it protects soil, feeds the ground layer, and supports habitat structure. Remove only what is smothering new growth or forming a wet mat. A partial, uneven layer is usually better than a bare, raked finish.
Drafted with AI; not yet reviewed by a person.
Leave a Reply