Last updated: November 05, 2026
Quick Answer: 2–3 inches is the usual target for mulch application quality and troubleshooting, with mulch kept off stems and trunks and spread in an even layer. Mulch application quality and troubleshooting is about fixing depth, placement, and edge control before they turn into plant problems. Mulch looks simple, but bad placement causes root rot, trunk damage, weeds, and thin spots fast. Good mulch work usually means a 2–3 inch layer kept off stems and trunks, with a clean edge and even coverage. The steps below sort out what “good” looks like, what goes wrong, and how to fix it.
I write on landscape maintenance and planting care, so I judge mulch by the plant, the soil, and the failure pattern—not by how tidy it looks from the sidewalk.
Key Takeaways
- A strong mulch job is even, shallow, and kept away from plant crowns and trunk bark.
- 2–3 inches is the usual target for most organic mulches; deeper layers can block air and water.
- A mulch volcano is not extra protection. It traps moisture against bark and can invite decay.
- Thin mulch usually means wind, slope, traffic, or poor edge control—not a bad mulch type.
- Problems show up as smell, crusting, weeds, fungus, bark darkening, or water running off instead of soaking in.
- The fix is usually mechanical: rake it back, regrade it, and reset the edge before adding more material.
- Fresh mulch, old mulch, and dyed mulch can all work if the depth and placement are right.
What good mulch application quality looks like

Picture this: you finish a bed, step back, and the whole area looks calm, even, and intentional, but the plants still have room to breathe. That is quality mulch application—a flat, uniform layer at the right depth, with no pile against trunks, stems, or crowns.
The cleanest result usually comes from a simple rule: spread mulch to 2–3 inches deep in planted beds, then taper it thinner near sensitive stems. The surface should look smooth, not mounded. Edges should stop cleanly at turf, concrete, or a bed border so the material does not spill.
A good job also matches the site. Shade beds often hold moisture longer, so they need less depth than hot, windy strip plantings. Sloped beds need tighter edging and sometimes a heavier mulch texture so rain does not move it. Sandy soil and clay soil change how fast water moves, but they do not change the basic rule: let the root zone breathe.
- Even depth across the bed
- Mulch pulled back from trunks and crowns
- Clean edge line
- No bare patches wider than a hand
- No mounded rings around plants
A small amount of soil showing at the base of woody plants is normal. A buried trunk flare is not.
How deep should mulch be, and why does depth matter?
Depth should usually stay at 2–3 inches, because that is enough to suppress many weeds and slow evaporation without choking the root zone. Deeper than that, mulch starts acting like a blanket that is too thick.
Too much mulch creates a few problems. Water can sit in the upper layer instead of reaching the soil, especially if the mulch has compacted. Fine mulch can crust on top and shed water. Deep layers can also hide a root flare, which makes it tempting to pile even more around the trunk. That leads to bark staying wet for long stretches.
The type of mulch matters here. Coarse bark mulch usually allows better airflow than very fine shredded material. Fine material can knit together and form a mat. That can be useful on steep slopes, but it also needs closer depth control.
Use this simple check:
- Spread mulch, then measure with your hand or a ruler in a few places.
- If it is over 3 inches, pull some back.
- If it is under 2 inches in a weed-prone bed, top it off lightly.
- If you see the base of a tree disappearing under mulch, stop and remove material.
The best part for many beds is that most mulch failures are visible before they become plant failures.
Why does mulch end up against trunks or stems?
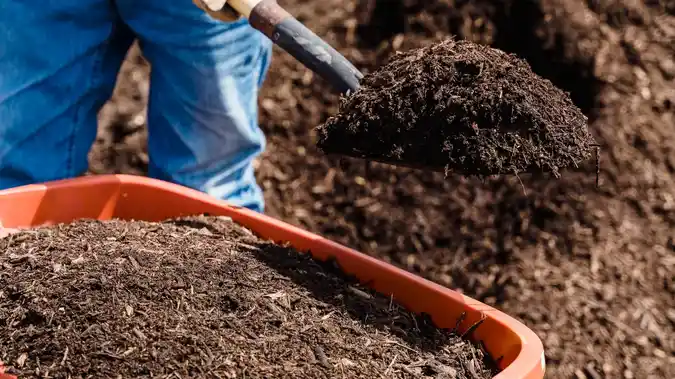
Mulch ends up against trunks because the last pass gets treated like a finishing touch instead of a measurement job. One extra shovel can turn a neat bed into a ring of trapped moisture in seconds.
That ring causes real trouble. Bark that stays damp can soften and break down. On young trees, the trunk flare gets buried, and roots may start growing in the wrong zone. Shrubs get the same problem at the crown: too much wet material pressed against the base can lead to rot, dieback, and hidden pests. If you are unsure whether the plant is already stressed, consult a qualified arborist or landscape professional.
Here’s the catch: many people think a “mulch donut” should become a “mulch volcano” for insurance. It should not. A volcano shape is one of the clearest signs of poor installation quality.
Fix it this way:
- Pull mulch back until the root flare is visible on trees.
- Leave a gap around woody stems and crowns.
- Re-level the bed so the mulch is flat, not peaked.
- Top off only if the depth is still below 2 inches after correction.
A young landscape can survive a little thin mulch. It does not survive a buried trunk well.
What causes mulch to fail after the first rain?
Mulch fails after the first rain because the bed was not shaped to hold the material in place. Slope, splash, and runoff expose weak work fast.
If mulch slides downhill, the bed likely needs better edging, a rougher surface underneath, or a coarser material. If it floats or mats, the mulch may be too fine or laid too thick. If it washes into the lawn, the border is too weak or the bed is sloped more than the material can handle.
Rain also reveals hidden compaction. A mulch layer that looked full when dry can settle to half its apparent depth after a storm, especially with shredded material. That is why a freshly installed bed often needs a second look within a week or two. University Extension guidance from the University of Massachusetts and Clemson University both notes that mulch should be kept away from trunks and maintained at a shallow depth.
Common causes and fixes:
- Slope: add edging or use a chunkier mulch
- Fine texture: switch to a coarser grade
- Poor bed edge: cut a sharper border
- Over-thick layer: rake it thinner before the next rain
- Compacted soil underneath: loosen the surface before spreading
On the flip side, some movement is normal in a new bed. A little settling is not a failure. A mulch drift into the driveway is.
How do I tell the difference between mulch problems and normal settling?
Mulch problems show up as shape, smell, and plant stress, while normal settling mostly looks like a small drop in depth. The difference matters because not every low spot needs a full redo.
Normal settling happens when loose mulch packs down after watering or rain. The surface may sink a little, but the bed still looks even, and the material stays where it was placed. That is common in the first 1–3 weeks after installation.
A real problem looks different:
- The bed has bald patches or exposed soil in rings.
- The mulch smells sour, swampy, or rotten.
- The layer turns crusty and sheds water.
- Weeds emerge through thin spots in just a few weeks.
- Tree bark looks dark, wet, or covered by material.
If the mulch layer has settled from 3 inches to about 2 inches, that is often fine. If it has settled unevenly, or if the top is matted into a hard crust, the issue is not settling. It is application quality.
A useful rule: if you can see the planting bed clearly but still feel mulch underfoot, the job is probably holding. If you sink into soft, spongy mulch, it is too deep or too wet.
Which mulch type is easiest to apply well?
Chunkier organic mulch is usually easiest to apply well because it is less likely to mat, wash, or crust. Shredded bark, pine bark nuggets, and other coarse materials are more forgiving than very fine mulch.
Fine mulch can look polished at first, but it is less stable on slopes and can seal over if applied too thick. Dyed mulch can also make coverage look uniform even when the depth is uneven, so it can hide a bad install. That is a visual trap, not a quality boost.
The right mulch type depends on the site:
- Shade beds: most organic mulches work well if depth stays in range
- Slopes: coarser mulch usually stays put better
- High-traffic areas: heavier texture resists scatter
- Formal beds: finer mulch can look tidy, but needs tighter control
A mulch that looks beautiful for one week and then mats into a slick layer is a poor choice for a steep bank. A rougher material may look less polished on day one but hold up longer.
The trade-off is plain: finer mulch often looks neater, coarser mulch often performs better. Choose based on site stress, not on the color on the bag.
Why do weeds still grow through mulch?
Weeds still grow through mulch because mulch blocks light better than it blocks already-established roots, seeds, and windblown debris. A good layer reduces weed pressure; it does not erase it.
If weeds are pushing through, one of three things is usually true. The mulch is too thin, the weed seeds landed on top of the mulch and rooted in the organic dust there, or the bed edge is open and keeps feeding new seeds into the area. In many cases, the mulch itself was fine but the bed was not cleaned thoroughly before spreading.
The fix is practical:
- Pull weeds before re-mulching.
- Remove seed heads and runners.
- Restore the mulch to 2–3 inches.
- Keep the edge clear so grass and weeds do not creep in.
- Watch the first month after installation.
Weed control also depends on maintenance. A bed that gets blown with leaf litter every week may need lighter top-ups more often because decomposed debris creates a new seedbed on top of the mulch.
Do not bury weeds under extra mulch and call that control. They usually return through the new layer.
The Honest Side-by-Side
Mulch quality problems are easier to fix when the issue is mapped against the symptom. The table below shows the most common trouble signs and what they usually mean in the field.
| Criteria | Typical good application | Typical bad application | Winner for this condition |
|---|---|---|---|
| Depth | Usually **2–3 inches** | Often over **3 inches** or under **1 inch** | Good application when you want balance |
| Trunk clearance | Gap around trunk or crown | Mulch touches bark or stems | Good application near trees and shrubs |
| Water movement | Water soaks in gradually | Water beads, runs off, or pools | Good application after rain |
| Weed pressure | Lower weed emergence | Frequent weeds in thin spots | Good application in weed-prone beds |
| Slope stability | Material stays put | Mulch slides or piles at the bottom | Good application on mild slopes |
| Appearance | Even, level, and clean-edged | Mounded, patchy, or cratered | Good application for curb appeal |
| Air exchange | Root zone stays open | Surface mats or seals over | Good application for woody plants |
| Maintenance | Easy to top off and inspect | Hard to tell where old mulch ends | Good application for long-term care |
The table makes one thing plain: a mulch job is not judged by color alone. It is judged by depth, clearance, and how the bed behaves after water hits it.
When should you fix mulch instead of adding more?
You should fix mulch instead of adding more when the shape is wrong, the depth is already high, or the base of the plant is buried. More material only makes those errors worse.
A lot of bad mulch jobs get “rescued” by dumping another bag on top. That usually hides the problem for a short time and creates a bigger one later. If the bed is uneven, rake it level first. If the mulch has crusted, break up the surface. If the base of the plant is covered, pull material back before you think about topping off.
Add more mulch only when:
- The layer is below 2 inches
- The bed is still even
- The root flare is visible
- The old mulch is not matted or sour
- The bed edge is holding
On the flip side, if mulch has decomposed into fine organic matter and blended into the soil, you may not need a heavy top-up at all. Sometimes the better move is light raking and a modest refresh.
A simple inspection in spring and again after heavy rain catches most of these problems early.
What should I do if mulch smells bad or looks slimy?
Bad-smelling or slimy mulch should be removed or turned, because that usually means low oxygen, excess moisture, or anaerobic decay. Fresh mulch should smell earthy, not sour or rotten.
This problem shows up most often in piles that stayed wet too long, mulch spread too thick, or fine mulch packed down in shade. The surface may look dark and slick, and it can feel soft underfoot. That is not normal bedding behavior.
The fix is to:
- Rake the mulch to break up the crust
- Remove any thick, wet clumps
- Thin the layer if it is above 3 inches
- Improve drainage if water sits in the bed
- Keep mulch away from trunks and crown areas
If the smell persists after the bed dries, the mulch may need to be replaced. Rotten mulch is not an aesthetic issue only; it can signal poor oxygen at the root zone.
The truth is, good mulch should fade into the background. When you smell it before you see it, something is off.
How do I troubleshoot mulch after installation?
You troubleshoot mulch by checking depth, placement, moisture, and edge control in that order. That sequence catches most problems before they spread.
Start with a quick field check:
- Measure the depth in several spots.
- Look at the base of every tree and shrub.
- Check whether water is soaking in or running off.
- Inspect for weeds, crusting, or washout.
- Reset the edge if the bed is bleeding into turf or pavement.
If the bed is too shallow, add mulch in thin passes, not one heavy dump. If it is too deep, pull some back into low areas or remove it from around trunks. If the mulch is moving, fix the border before adding more weight.
A lot of troubleshooting comes down to restraint. The strongest-looking pile is often the weakest installation. A flatter bed with visible trunk flare and even coverage will usually hold up better over a season.
If the issue is recurring every few weeks, the site design may be the real problem. Shade, slope, sprinkler overspray, and foot traffic all affect mulch performance.
What are the exception cases where the rules change?
The standard rules change when the site itself changes. A formal bed, a steep bank, a tree ring, and a planting strip all ask for different handling.
Here are the cases where the usual call flips:
- Steep slopes: use a coarser mulch and tighter edge control, even if it looks less polished.
- Newly planted trees: keep mulch even more conservative near the trunk so the flare stays open.
- Very windy sites: a slightly heavier-textured mulch may stay put better than fine bark.
- Beds with sprinkler overspray: check for constant wetness, because the same depth that works elsewhere may stay too wet here.
There is one more flip case: if the bed has poor soil structure and water sits after every storm, mulch alone will not solve it. The real fix is drainage or grading work, not another layer on top. The University of Minnesota Extension and the Arbor Day Foundation both emphasize keeping mulch away from trunks and avoiding excessive depth.
So the rule is not “always more mulch.” It is “the right depth, in the right place, for the site you have.”
What’s the fastest way to improve mulch quality without starting over?
If the bed is already close, the fastest improvement is usually to pull mulch back from trunks, level the bed, and reset the depth to 2–3 inches. That fix solves more problems than any color change or fresh top coat.
If time is short, do this first:
- Remove the volcano shape.
- Smooth out ridges and hollows.
- Top off only the thin spots.
- Clean the edge line.
- Check water behavior after the next rain.
If the mulch is already slimy, smelly, or badly matted, starting over may be faster than trying to save it. But if the issue is mostly shape and depth, a careful rake-through can bring the bed back into line.
That is the quiet lesson of mulch work: good quality is mostly discipline. The material matters, but placement matters more.
FAQ
How deep should mulch be around plants?
Mulch should usually be 2–3 inches deep around most plants. That depth gives coverage without burying crowns or slowing water movement too much. If you already have more than that, pull material back before adding anything else.
Should mulch touch the trunk of a tree?
No, mulch should not touch the trunk of a tree. Leave a gap so the bark and root flare stay visible and dry enough to avoid decay. A ring pressed against the trunk is a mulch volcano, and that is a bad install.
Why is my mulch washing away?
Your mulch is probably washing away because the bed is sloped, the edge is weak, or the mulch is too fine. Coarser material and a sharper border usually help. If water keeps moving the bed, the grading may need work too.
Can I put new mulch over old mulch?
Yes, but only if the old layer is still loose, clean, and below the target depth. If it is matted, sour, or already too deep, rake or remove part of it first. Adding fresh mulch to a bad base usually hides the problem instead of fixing it.
Why are weeds growing through my mulch?
Weeds grow through mulch when the layer is too thin, when weed seeds land on top, or when the bed edge keeps feeding new growth into the area. Mulch helps a lot, but it is not a full weed barrier. A clean bed edge and the right depth make the biggest difference.
Drafted with AI; not yet reviewed by a person.
Leave a Reply