Last updated: November 05, 2026
Quick answer: To remove mulch that was spread too thick, pull it back from the plant crown, thin the layer, and remove the excess with a rake or shovel. In most beds, a 6- to 12-inch gap around each crown is enough to start. The steps below show how to clear an overapplied mulch layer without tearing up roots, burying stems, or wasting good material. How to Remove Mulch That Was Spread Too Thick is the process of correcting an overly deep mulch layer without harming plants.
What thick mulch does to a garden bed
Thick mulch traps water and blocks air near the soil surface, which is why an overapplied bed starts to look tired fast. Picture this: you’re standing at a garden bed where the mulch sits up against stems in a 3- to 4-inch heap, and the plants look soft at the base. That extra depth is the problem, not the mulch itself.
The first fix is simple: open the bed back up around each plant crown. The crown is the point where stems meet roots, and it should not sit under a heavy blanket of mulch. If the mulch is piled there, the stems stay damp longer than they should.
- Inspect the bed with your hands and eyes, looking for mulch piled against stems, crowns, and woody trunks.
- Pull back the mulch until you see bare soil around each crown.
- Rake the loose top layer toward the open parts of the bed.
- Remove the excess into a wheelbarrow, tarp, or bucket.
A bed that looks “finished” from the path can still be too deep once you get close. That is why the first pass should be about shape, not speed. If you only skim the top, the mulch near the stems stays packed and the problem comes right back after the next rain.
How do you remove mulch that was spread too thick?

You remove thick mulch by lifting the top layer, thinning what stays, and clearing the mulch away from the plant crown. Picture this: you’re in the bed with a shovel in one hand and a rake in the other, moving mulch from the tight spots to the open ones. The goal is root-crown clearance, then a more even surface.
Use a flat shovel for heavy piles and a leaf rake for light, fluffy mulch. If the bed is full of shredded bark or wood chips, the rake usually does most of the work. If the mulch is wet and matted, the shovel helps break it loose in chunks. The point is to move material, not dig into the soil.
- Shovel the thickest piles into a tarp or wheelbarrow.
- Rake the remaining mulch so it lies in a thinner, even layer.
- Hand-pull mulch back from every stem and trunk base.
- Check that the mulch no longer touches the plant crown.
- Smooth the bed so water can move through it instead of pooling on top.
If you hit a root, stop. Rake around it or lift from another angle. A clean bed edge looks better and keeps the work from becoming a soil job. If the mulch is only loose and fluffy, you may not need a shovel at all.
Which tools make the job easier?
The right tools make this a 20-minute cleanup instead of a full-bed excavation. Picture this: you’re trying to clear a thick layer after a storm, and the mulch is wet, slick, and twice as heavy as it looked yesterday. That is when a shovel, rake, and tarp earn their keep.
A flat shovel moves bulk. A garden rake or leaf rake spreads and levels. A tarp gives you one place to dump the excess so you can reuse it later or haul it away in a clean load. Gloves help, too, because bark splinters and damp mulch both scrape skin.
- Flat shovel: Best for lifting heavy clumps and scooping from tight corners.
- Leaf rake: Best for thinning loose mulch without scraping the soil.
- Garden rake: Better for coarse material that won’t glide through a leaf rake.
- Bucket or wheelbarrow: Useful when you have several small piles to move.
- Gloves: Worth wearing if the mulch is rough, moldy, or wet.
A hoe can look tempting, but it tends to drag soil up with the mulch. That creates a muddy mess and changes the bed surface. Use it only if the mulch is crusted and you need to break the top layer first. For most beds, the simpler tools are faster.
Step-by-step: thinning a mulch bed without hurting plants
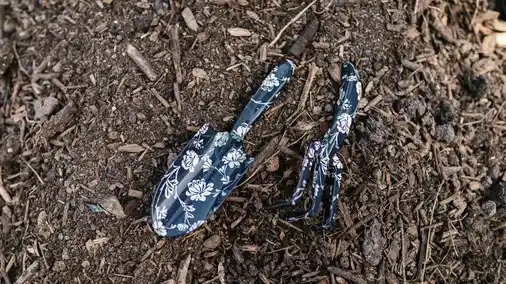
Thinning mulch without hurting plants means working from the top down and from the stem out. Picture this: you’re kneeling beside a row of shrubs, clearing a narrow ring first and then opening the rest of the bed. That order matters because the plant crown gets protected before you move a bigger volume of mulch.
Here is the cleanest sequence for a normal garden bed:
- Rake the loose mulch away from each crown in a 6- to 12-inch ring.
- Lift the thickest areas with a shovel and set the mulch aside.
- Spread the remaining mulch so the surface looks even from end to end.
- Remove any pieces that still touch stems, trunks, or low branches.
- Measure the bed by eye from several angles and stop when the layer looks thin, not mounded.
If the mulch is packed hard, work in slices rather than trying to lift one giant mat. A 1- to 2-foot section at a time keeps the bed stable and makes it easier to see where the roots begin. Most damage happens when someone yanks on a whole clump and tears at the base of a plant.
Two links worth keeping in mind while you work are the Mulch and Soil Council and the University of New Hampshire Extension, which both publish practical mulch guidance. You do not need a degree to use the method, but it helps to borrow the plain language of people who write about soil for a living. That keeps the work grounded in real bed care instead of guesswork.
What to do with the excess mulch
Excess mulch can go back into the bed, into another bed, or into storage if it is still clean and workable. Picture this: you’re left with a tarp full of bark and you do not want to throw away material you can use later. Whether the mulch stays useful depends on whether it is fresh, dirty, or weed-filled.
Clean mulch that came from the top of the bed is usually reusable. If it is full of weed roots, seeds, or soggy clumps that have started to break down badly, it belongs in a compost pile or a disposal load, not right back on the bed. Reused mulch should not go back in a thick layer on the same spot.
- Reuse it in a thinner layer on another bed that needs topping off.
- Store it in a dry corner on a tarp if you plan to use it within a week or two.
- Compost it if it is mixed with leaves, soil, or old plant debris.
- Discard it if it is moldy, foul, or packed with weed seed heads.
Do not pile the leftover mulch against a fence or wall where it stays wet. That invites more decay and makes the pile harder to move later. A shallow, loose stack dries better and stays usable longer.
Fixing the depth so the bed stays healthy
Fixing the depth means leaving the bed thin enough that water can reach the soil and air can still move near the surface. Picture this: you’re stepping back from the bed after cleanup and checking whether the mulch now looks like a cover, not a mattress. That visual test matters because a bed can be “neat” and still be too deep.
After thinning, scan for three things: mulch touching stems, mulch hiding the base of woody plants, and mulch piled deeper in hollows than on the rest of the bed. Smooth those spots first. A safer-looking bed is one that leaves a clear gap around the crown and keeps the rest of the surface level.
A few common mistakes cost extra work:
- Leaving a mulch volcano around trunks and crowns traps moisture where it should not sit.
- Raking only the top leaves the lower layer compressed.
- Mixing soil into mulch creates a dense crust that sheds water.
- Removing too much at once can expose roots on shallow-rooted plants.
If the bed started out very deep, expect to make a second pass after the first rain. The mulch will settle. What you do not want is a bed that keeps rebuilding into a mound because no one corrected the edges and the crown clearance.
When should you stop and leave some mulch in place?
You should stop once the mulch is thin, even, and clear of plant crowns, because stripping every bit away can leave soil exposed. Picture this: you’re tempted to keep removing material because the bed still looks full, but the roots are already showing near the surface. At that point, more removal can do more harm than good.
Leave a light cover if the bed has bare soil that dries fast or if erosion is already starting on a slope. Stop as soon as the mulch is no longer in direct contact with stems or trunks and the surface no longer forms a mound. The aim is depth correction, not bare earth.
Use this quick check:
- If mulch touches the crown, remove more.
- If the soil is exposed in patches, spread the excess across those patches.
- If the bed still looks lumpy, rake it once more.
- If the surface is even and loose, stop.
A perfectly stripped bed is not the goal. A balanced bed is. That is the difference between cleanup and damage control.
Key Takeaways
- Thick mulch should be pulled back from stems first, then thinned across the rest of the bed.
- A shovel, rake, and tarp are usually enough for the job.
- Keep mulch off the plant crown and away from trunks.
- Clean excess mulch can often be reused elsewhere.
- The finished bed should look even, loose, and open at the base of each plant.
How much mulch is too thick?
Mulch is too thick when it piles against stems, trunks, or crowns and forms a heavy mound instead of a light cover. If the bed looks damp for too long or the mulch mats into a tight layer, it needs thinning. The exact depth depends on the plant and bed, but a warning sign is mulch touching the plant base.
Can you remove extra mulch without hurting plants?
Yes, you can remove extra mulch without hurting plants if you work slowly and clear the area around each crown first. Use a rake for loose mulch and a shovel for heavy clumps, then stop when the stems are exposed at the base. The danger comes from digging into roots or yanking out packed mulch in one pull.
What do you do with excess mulch?
You can reuse clean excess mulch in another bed, store it briefly on a tarp, or compost it if it is mixed with plant debris. If it is moldy, weed-filled, or badly broken down, it is better to remove it from the garden altogether. Keep it loose and dry so it stays usable.
Drafted with AI; not yet reviewed by a person.
Leave a Reply