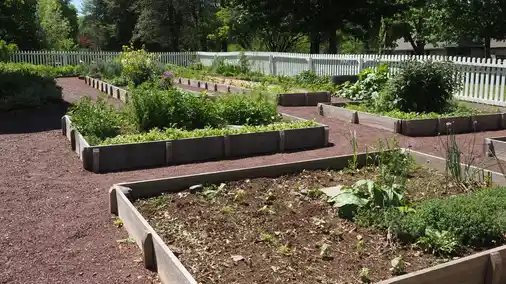
Last updated: November 06, 2026
Quick answer: Measure the full bed, subtract every temporary protection zone, then add back any paths or strips you still want covered. This guide to How to Estimate Mulch for a Bed with Temporary Plant Protection Zones shows how to handle tree guards, nursery pots, tarps, garden flags, and no-mulch buffers without overbuying or burying what needs to stay open. For coverage and measurement basics, see the University of Minnesota Extension and Penn State Extension.
Key Takeaways
- Measure the bed, then subtract the zones that should not receive mulch.
- Temporary protection zones change the order quantity, not the bed shape.
- Skip areas where mulch would block care, cover markers, or press on temporary setups.
- Order for the net area, not the full outline.
Start with the bed shape, then mark every temporary exclusion
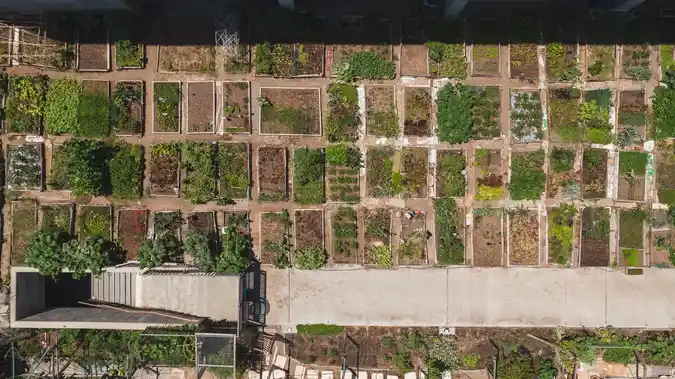
Picture this: you’re standing at a bed edge with a tape, a few garden flags, and a short list of spots that need to stay open for a transplant week or a seasonal hold. You need one clean number, not a guess, and the temporary plant protection zone is the part that changes the math.
The right method is simple: estimate the bed as if it were fully mulched, then subtract each zone that should stay bare. That includes a no-mulch buffer, a tarped patch, a staging circle around nursery pots, and a strip kept open for access. If the open space is only for a short period, treat it as a temporary exclusion and, if needed, confirm the setup with a landscape professional; local extension guidance can help you check the layout.
Use a tape measure, a stake, and a flag. Mark the zone on the ground before you measure anything else.
- Tree guards often create a small circle or square you want to keep open.
- Nursery pots usually need a wider ring so you can move them without scraping bark chips into the pot line.
- Tarps need a full perimeter left clear so the edge does not get buried.
- Garden flags help you see the boundary from a few steps back.
Instead of assuming every open patch stays open permanently, note the temporary plant protection zone on your sketch and keep moving.
How to measure mulch for a bed with temporary plant protection zones
You measure the bed first, then subtract the square footage or square meters of each zone that will not take mulch. That gives you the net area to cover, which is the number you actually need for your order.
Picture this: you’re looking at a long border with two tree guards, one staging area for transplants, and a 2-foot-wide access strip. The bed still needs coverage, but not everywhere, and guessing from the outer outline alone will waste material.
Use a measuring tape and sketch the bed on paper or in your phone notes. For each zone, write the shape and the measurements. If a zone is a simple rectangle, multiply length by width. If it is a circle, use the radius method from your measurement guide or the supplier’s calculator; if you do not want to do geometry, break the zone into small rectangles. For a second check on safe spacing and setup, see the Colorado State University Extension.
- Measure the full bed footprint.
- Measure each temporary exclusion zone.
- Subtract those zone areas from the bed area.
- Add any access strips that still need mulch.
- Convert the net area into bag count or yardage.
That order keeps you from double-counting the same patch. A 10-by-12-foot bed with a 3-by-4-foot staging zone is not a 120-square-foot mulch job anymore; it is a smaller job once that zone is removed from the total.
Here’s the catch: if the zone is only temporary, you still need to record it. The next replanting cycle may need a different number.
What counts as a zone you should skip?

A zone you should skip is any patch where mulch would block plant care, hide a marker, or press against a temporary setup. That usually means a no-mulch buffer, a planting staging area, a protected root area, or a path that workers need for a few days or a season.
Picture this: you’re setting out two tree guards near the center line and a tarp beside them for cleanup. If you cover everything evenly, the guard edge gets buried, the tarp edge disappears, and the path turns into a mess. The goal is not perfect coverage. The goal is usable coverage.
Keep these areas separate on your sketch:
- Tree guards: leave a visible ring so the guard can be inspected and lifted.
- Nursery pots: leave enough open ground to set and remove pots without digging through mulch.
- Tarps: leave the edge clear so wind does not catch a buried lip.
- Garden flags: keep them visible so the temporary layout can be read at a glance.
- Access paths: leave open if foot traffic or a cart needs to pass.
A common mistake is treating every open spot as a hole in the bed plan. That leads to under-ordering if the path still needs a surface, or over-ordering if you forget that the zone is already excluded. If a path is only temporary and will be reopened later, write that on the plan now. The note costs nothing and saves a second trip. If the boundary is unclear, consult a landscape professional before you buy.
How much mulch do you need after you subtract the open areas?
You need the amount that covers the net area, not the whole bed outline. That means the final number comes from the covered square footage or square meters after exclusions are removed, then converted into depth.
Picture this: you’re standing over a bed with a 2-foot access path and a few nursery pots staged at one end. The outer shape still looks large, but the working area is smaller once those spaces are pulled out of the calculation.
Use this sequence:
- Measure the bed footprint.
- Mark each temporary zone.
- Subtract every excluded area.
- Decide the mulch depth you want for the covered area.
- Convert the net area into the amount you need.
If you buy in bags, read the coverage printed on the bag at the depth you plan to use. If you buy in bulk, use the supplier’s coverage chart for the depth you want. A 2-inch layer and a 3-inch layer are not close enough to guess between. The difference is real, and the University of Minnesota Extension notes that mulch depth matters for plant health and moisture control.
A simple worked setup helps: if the bed is 200 square feet and your temporary zones add up to 40 square feet, you are covering 160 square feet. Order for that 160, then keep the zone notes for the next round.
The truth is, the mistake most people make is buying for the shape they see, not the shape they will actually cover.
Where do access paths fit into the estimate?
Access paths count only if you are covering them on purpose. If the path stays bare, it comes out of the mulch number. If the path gets a thin cover for foot traffic control, it stays in the estimate.
Picture this: you’re leaving a 18-inch strip open between a transplant row and the rest of the bed. That strip may look minor, but over a long run it can remove a noticeable amount of coverage from your order.
Treat paths like any other temporary zone:
- Measure the length and width.
- Decide whether the path is bare or covered.
- Subtract bare paths from the total.
- Keep covered paths in the total.
If the path changes later, do not force one number to do two jobs. A transplant lane for this week may become a planting strip next month. Write the intended use on the sketch so you do not mix the old layout with the new one.
This is also where garden flags help. A flag at each end of the path makes the boundary visible while you are measuring, and it keeps the team from “correcting” the layout after the math is done.
How do you handle short-term coverage without overbuying?
You handle short-term coverage by estimating for the current layout only, then keeping the excluded zones separate for the next stage. Do not buy for the bed you hope to have later if that would leave too much material unused now.
Picture this: you’re covering a bed for a two-week protection window before plants are moved. The space under the nursery pots, tarp edges, and staged transplants does not need the same finish as the final bed, so the estimate should match the short-term plan.
A few practical rules keep the number honest:
- Use the current footprint, not the future one.
- Keep a separate note for areas that will open up later.
- Re-measure after the pots, guards, or tarps come out.
- Save the sketch for the next mulch run.
This is where the page on planning and measurement fundamentals earns its keep; the same tape-and-sketch method works here, just with temporary exclusions layered in.
On the flip side, if you skip this step and order for the future layout, the leftover material can sit in a pile while the bed still looks thin in the areas you actually needed to cover today.
Common mistakes that throw off the number
The first mistake is measuring the bed wall-to-wall and forgetting the temporary exclusions. That leads to too much material and a messy cleanup around tree guards, pots, and tarps. The second mistake is subtracting the zones twice, which leaves you short.
Picture this: you’re checking your notes after the order is placed and realizing the access strip was counted as both “open” and “covered.” That one slip can change the whole estimate.
Watch for these errors:
- Leaving out the no-mulch buffer: roots, stems, or temporary markers get buried.
- Forgetting the access path: the bed seems smaller than it is, so the order comes in short.
- Counting the same zone twice: you subtract it once in the sketch and again in your head.
- Using the final layout too soon: a bed that will change in 2 days does not need a final-bed estimate today.
A good habit is to label each zone as either “exclude” or “keep.” That single word prevents most mistakes. If the area changes, cross out the old label and rewrite it. A clean note beats a clever memory every time. If the zone is unusually complex, ask a landscape professional to verify the sketch.
Quick checklist before you buy
You buy the right amount when your sketch, measurements, and temporary zones all point to the same net area. If those three do not match, stop and fix the numbers before you order.
Picture this: you’re about to load bags or call for bulk delivery, and the bed still has flags in the ground. That is the moment to confirm the math, not after the material arrives.
Check these items:
- The bed footprint is written down.
- Every temporary plant protection zone is marked.
- Tree guards, nursery pots, tarps, and flags are all accounted for.
- Bare access paths are subtracted.
- Covered paths are included.
- The final number matches the coverage depth you want.
If one number feels off, go back one step and remeasure only that section. Do not redo the whole bed unless the layout changed. A 5-minute correction now is much cheaper than hauling extra material back later.
FAQ
How do you keep mulch out of a temporary planting zone?
You keep mulch out by marking the zone before spreading anything and by stopping the spread line at the flag or stake. Use a clear no-mulch buffer around tree guards, nursery pots, tarps, or transplant spots. If the edge keeps creeping in, widen the buffer and reset the boundary.
How do you estimate mulch around plants you will move later?
You estimate only the area that will stay covered while the plants are still there. Measure the current layout, subtract the move-out space, and ignore the future layout for now. Recalculate after the plants move so you do not buy for two different beds at once.
How do you mark off areas to skip when mulching?
You mark them with garden flags, stakes, or another visible line before you measure. Then you write each skipped area on the sketch as an excluded zone. That makes the subtraction step clear and keeps tree guards, pots, and tarps from getting buried by accident.
Drafted with AI; not yet reviewed by a person.
Leave a Reply