
Last updated: November 02, 2026
Key Takeaways
- Mark obstacles first, then plan the mulch around them.
- Keep exposed roots in a thin layer and leave the flare or stem base visible.
- Leave utility access points open with a clear, reachable border.
- Finish mulch at boulders by tucking the edge, not by burying the stone.
A How to Mulch a Bed with Boulders, Roots, or Exposed Utilities job needs careful mulch placement, not a full blanket. In the first pass, keep the bed readable, keep service points visible, and leave roots, cleanout caps, and access covers open. A small bed can still need three separate no-mulch zones.
The right move is to mulch the open soil, keep service points visible, and leave roots, cleanout caps, and access covers readable at a glance. The steps below settle where mulch goes, where it stops, and how to finish the edge without burying the problem. The mulch depth should be shallow where access matters.
Start with the obstacle map, not the mulch pile
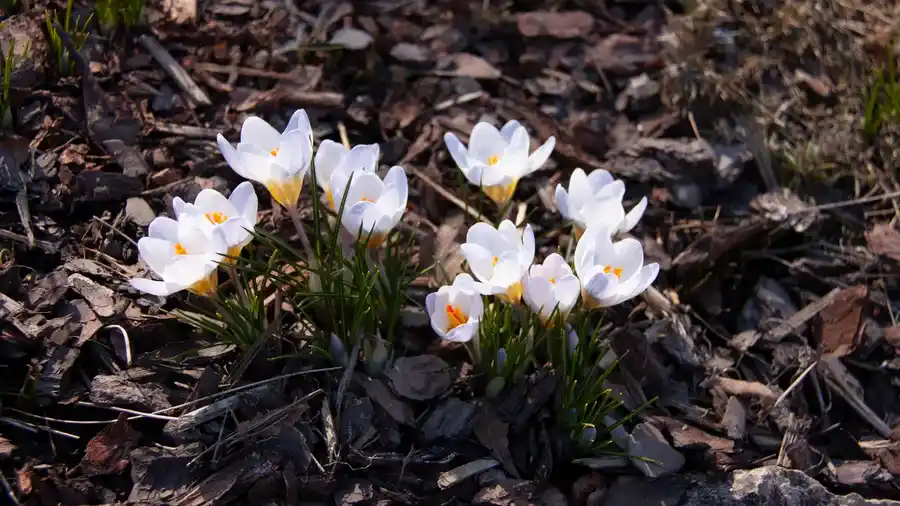
Picture this: you’re standing at a landscape bed with a boulder, a surface root, and a utility box all in the same strip of soil. You do not spread mulch first and sort it out later; you mark the obstacles and build the mulch plan around them. That first map saves rework later.
Start by naming the fixed points. A boulder stays exposed on purpose, a surface root may stay partly visible, and a utility box or cleanout cap must remain accessible. If the bed has more than one obstacle, sketch the spaces between them before you touch the mulch. That keeps you from covering a lid you’ll need in 3 months.
Use one simple rule: mulch the soil, not the object. Give each obstacle a clean border of open space so the bed reads as finished, not packed. A 3-inch blanket over everything will hide the design.
- Mark utility lids, cleanout caps, irrigation heads, and valve boxes before spreading anything.
- Measure the narrowest gap in the bed so you know where mulch depth will naturally pinch down.
- Keep the boulder’s base visible; don’t pile mulch against stone and call it finished.
This planning step also keeps the bed from looking patchy when you only mulch part of it. The eye sees intentional spacing, not a mistake. It also makes later cleanup faster.
How do you mulch around exposed roots?
You mulch around exposed roots by using a thin, even layer and stopping short of the trunk flare or stem base. Roots near the surface need breathing room, not a mound of wet wood chips pressed into every groove. A 1- to 2-inch layer is usually enough near roots.
Picture this: you’re looking at roots that cross the bed like cords under carpet. If those roots belong to a tree or large shrub, leave the root line visible where it sits high, then feather mulch over the bare soil beside it. The goal is to soften the bed while keeping the root pattern readable and dry.
Use a rake or gloved hand to place mulch in the low spots first. Around roots, a shallower layer is safer than a thick one. If the mulch is more than a light cover, it tends to bridge over roots, trap moisture, and make the bed look lumpy.
- Rake the soil flat where possible, so the mulch doesn’t collect in hollows.
- Set mulch beside the roots, not over the highest ridges, to keep the surface even.
- Feather the edges so the transition from bare soil to covered soil is gradual.
- Stop before the root flare, trunk, or stem base so the plant base stays visible.
- Check from standing height; the root should look natural, not buried.
A shallow layer is the right call here. Deep mulch over roots is a common mistake, and it costs you visibility, airflow, and a clean edge. If you can still see the shape of the root without seeing raw dirt everywhere, you’ve done enough.
How do you keep utilities visible and easy to open?

You keep utilities visible by cutting a clear no-mulch ring around each access point and leaving enough open space to grab a cover or key. A utility box, cleanout cap, or valve lid should look easy to find even after rain. Keep at least a few inches of open space so the lid can move freely.
Picture this: you’re trying to locate a buried lid after the mulch has settled. Bad plan. Leave a visible border around every access point, and don’t let chips flow over the seam where the cover opens. If the lid swings up, slides off, or needs a wrench, the surrounding mulch should never interfere with that motion.
Use a tighter boundary near utility hardware than you would around plants. Two things matter there: visibility and access. The mulch can frame the object, but it can’t hide the joint, fastener, or edge. The EPA advises keeping utility access clear when it must remain serviceable.
- Leave a clear opening around each utility box or cleanout cap.
- Keep the mulch lower at the front edge so the lid can still be lifted cleanly.
- Sweep stray chips off the cover after spreading.
- Recheck after the first rain, because mulch shifts toward low spots.
Here’s the catch: the bed can still look finished if the opening is deliberate. A neat oval or square of open space around the utility reads as maintenance, not neglect. That is the right finish when the hardware has to stay accessible.
How do you finish mulch around boulders?
The safest finish is usually to tuck the edge, not bury the stone. The boulder should look rooted in the bed, with its base defined and the mulch ending in a clean line. If the rock is large or unstable, check the layout with a landscaper before building against it.
Picture this: you’re shaping mulch against a rock that breaks the bed into two sections. If you pile chips up the sides, the boulder looks shorter and the bed looks heavy. If you stop the mulch at the stone’s widest point and clean the border by hand, the rock stays the visual anchor.
The stone itself is not the mulch target. Treat it like a hard boundary and let the mulch meet it with a narrow, controlled edge. On irregular rocks, it often helps to stop 1 to 2 inches shy of the stone face in visible spots so you don’t smear chips across the contour.
- Brush mulch away from the stone face before you step back.
- Follow the boulder’s curve with a hand tool for a crisp edge.
- Keep the top and upper sides exposed if the rock is part of the design.
- Fill the soil beside the stone, not the cracks you want to stay visible.
A boulder buried halfway in mulch usually looks accidental. That is the wrong finish for a feature stone and a poor fit for a bed that already has fixed obstacles.
How much of the bed should you cover?
You should cover all open soil that does not block access and leave the rest exposed by design. Partial coverage is normal in obstructed beds, and it often looks better than forcing a full blanket across every inch. A bed with three obstacles may end up with three open zones.
Picture this: you’re working in a bed where a root, a rock, and a utility lid split the space into islands. Mulch the soil islands that can take it, then stop cleanly at each obstacle. The uncovered areas are not failure; they are the price of access and plant safety.
This is where many people go wrong. They think the bed has to look uniform from every angle, so they push mulch into places it shouldn’t go. That creates a false smoothness that hides service points and crowds roots. A bed with honest gaps often looks more professional than one with a fake carpet of chips.
Think in zones:
- Cover zone: open soil that can take mulch without hiding hardware.
- Buffer zone: the strip around roots, stone edges, and lids.
- No-cover zone: cleanout caps, box lids, and any point that must remain reachable.
If the bed is long, repeat the same logic every few feet so the pattern stays consistent. The eye likes rhythm. It does not need perfect symmetry.
Common mistakes that make a obstructed mulch bed look worse
A bed with obstacles gets messy fast if you spread mulch like the site is empty. The usual mistakes are easy to spot and easy to avoid once you know the cost. A few inches too much can change the whole bed.
Picture this: you’re halfway through the job and the mulch already looks wrong. The pile is too deep at the base of a root, the lid is half-covered, and the boulder has disappeared into a brown hump. That is the moment to stop and reset the edge.
The biggest mistakes are simple:
- Burying utility covers. This costs time later when you need access and can’t find the lid.
- Packing mulch against roots. This traps moisture and makes the root zone look soggy and crowded.
- Mounding around boulders. This hides the stone’s shape and makes the bed look heavier than it is.
- Leaving ragged edges. This makes a partial bed look unfinished even when the mulch is otherwise correct.
The fix is the same every time: reduce depth, expose the access point, and redraw the border with your hand or a small rake. A cleaner edge beats a thicker layer.
One more thing: do not assume more mulch solves a bare spot. Around obstacles, too much mulch usually makes the bed worse, not better. Thin and deliberate wins here.
How to keep the finished bed looking clean after rain
You keep the bed looking clean after rain by checking for drift, settling, and blocked access the same day or the next dry day. Water will push mulch toward low spots, especially around stones and roots.
Picture this: you’re looking at the bed after a hard rain and the mulch has slid toward the base of a boulder or into a utility recess. That is normal. The correction is quick if the original layout was sound.
Use a small rake or your hand to pull mulch back off lids, caps, and exposed roots. Rebuild the clean edge where the water softened it. If one area keeps washing bare, you may need a low border, a slight grade change, or less mulch in that pocket.
- Pull chips off utility covers right away.
- Reopen the gap around roots if mulch has slumped into them.
- Tighten the edge against stone after the bed dries.
- Watch the first two storms; that is when the weak spots show.
The truth is, obstructed beds need a little upkeep. That is not a flaw. It is part of making a bed with fixed features look finished instead of buried.
Keep the spacing intentional
The right mulch job in a bed with boulders, roots, or exposed utilities is controlled, not complete. You leave access where you need it, keep roots from being smothered, and let the stone stay visible as a design element.
Picture this: you’re done, and the bed still reads as one space even with gaps in it. That is the goal. The open circles around lids and the clean border at the boulder are not leftovers. They are the design.
For a broader look at placement choices in different beds, the hub on mulch application methods covers the other patterns that fit less obstructed sites. For tree-related root questions, see the USDA Forest Service and Arbor Day Foundation guidance on preserving root flare and surface roots. For utility access, check local utility rules before you cover any lid.
Can you mulch around exposed roots?
Yes, you can mulch around exposed roots if you keep the layer shallow and leave the highest parts visible. The root should still read as a root, not as a buried ridge. If the roots are large or part of a tree base, keep mulch off the flare and avoid piling it into the crotch where the stem begins.
Should utilities stay uncovered?
Yes, utility access points should stay uncovered and easy to open. A cleanout cap, utility box, or valve lid needs a clear border so you can find and use it later. Mulch can frame the area, but it should not block the lid, fill the seam, or hide the hardware.
How do you finish mulch around fixed obstacles?
You finish mulch around fixed obstacles by cutting a neat edge and stopping the mulch before it swallows the object. Around boulders, keep the stone exposed. Around roots, feather the mulch into the soil. Around utilities, leave a visible access zone so the cover stays obvious and usable.
Drafted with AI; not yet reviewed by a person.
Leave a Reply