Last updated: November 06, 2026
Mulch logistics, handling, and jobsite workflow — The Complete Guide starts with one question: how do you move material to the beds with the fewest touches and the least cleanup? Quick answer: on most jobs, the best workflow is to confirm access, staging, and crew roles before delivery, then keep the travel path as short and direct as the site allows. The steps below explain how to receive mulch, move it, place it, and keep the jobsite from going sideways.
In short: treat mulch like a short-haul material flow problem, not a landscaping afterthought, and consult a professional if the site has slope, soft ground, or tight access.
Key Takeaways
- A strong workflow starts before delivery: confirm dump access, staging space, and who is moving material.
- The fewer times mulch gets handled, the faster the job goes and the cleaner the site stays.
- Wet material, tight access, steep grades, and long carry distances change the plan fast.
- A skid steer, compact loader, wheelbarrows, tarps, and a clear laydown zone solve different problems.
- Bad staging can cost more than bad spreading because it creates double handling and damaged beds.
- The right plan depends on lot size, access, slope, and how much mulch has to move.
What Actually Determines the Right Mulch Workflow?

The right workflow depends on access, distance, and how many times you touch the material. If the truck can dump close to the beds and the crew can move it once, the job is simple; if the site forces a carry, a reload, or a detour around finished work, the plan changes.
Picture this: you’re standing on a site with one driveway, soft turf, a narrow side yard, and beds on both sides of the house. The truck is on the clock, the crew is waiting, and every extra yard you move by hand adds time. That is where most mulch jobs lose money.
| Situation | Best Path | Why Other Options Fail |
|---|---|---|
| Wide access, hard surface, room to stage | Dump near the work zone and move with a skid steer or loader | Wheelbarrows waste time over long runs; hand carries crush labor |
| Tight gate, narrow side yard, finished lawn | Stage at one edge and feed beds with carts or tubs | Driving across turf tears the site up |
| Sloped yard | Keep the pile uphill from the beds when possible | Pushing uphill or carrying downhill both slow the crew |
| Small residential refresh | Direct delivery into the work area, then hand spread | Overstaging creates cleanup and double handling |
| Large commercial bed renewal | Break the site into zones and sequence delivery by zone | One big pile becomes a traffic jam |
The first question is always: how far does the mulch have to travel after delivery? The second is: what can travel over the surface without damage? A skid steer with a 68-inch bucket can move a lot, but it still needs room to turn. A wheelbarrow needs almost no access, but it burns labor fast.
Before the truck shows up, use this sequence:
- Walk the site and mark the dump point, staging point, and bed edges with flags or paint.
- Measure the longest carry distance in feet, not guesses.
- Check whether the surface can take rubber tire traffic without ruts.
- Assign one path for people and one path for equipment.
- Decide who spots the truck and who clears obstacles.
- Set the order of beds so finished areas are not crossed again.
Here’s the catch: if you skip the route plan, you end up with the pile in the wrong place and the crew doing extra hand work just to fix the layout. That is not a spreading problem. It is a logistics problem.
A clean workflow usually keeps the truck, pile, and beds in a straight line when the site allows it. If that line is broken by a fence, stairs, or delicate plantings, then the site needs a relay point. That relay point can be as simple as a tarp pad or a plywood staging strip.
Quick check: if the crew has to carry material more than once, or if equipment has to cross finished surfaces, this is the section that applies to you.
How Do You Stage Mulch So the Crew Isn’t Fighting the Pile?
You stage mulch by placing it where the next move is obvious and the bed edge is reachable without crossing the whole site. If the pile sits in the wrong spot, every shovel load turns into extra walking, extra turning, and more cleanup at the end.
Picture this: you’ve got 8 cubic yards on site, the beds wrap around the house, and the pile is sitting in the middle of the driveway because that felt safe at delivery. Safe for the truck is not the same as efficient for the crew. You want the pile where the first shovel shot lands near the first bed, not where the driver had the easiest turn.
The staging zone should be flat, visible, and wide enough for a loader bucket, a pallet, or a dump spread. On most jobs, that means one of three spots: the driveway edge, a hard side yard, or a temporary pad protected with plywood or heavy-duty tarp. For a small install, a single staging point works. For a bigger property, split the pile into two zones so the crew is not marching across the site with every load.
Use this decision path:
- Put the pile on a surface that can be cleaned in under 10 minutes.
- Keep it off drains, soft turf, and root zones.
- Leave room for a wheelbarrow to turn without reversing across beds.
- Stack it low enough that the crew can shovel safely from the face.
- Place tarps or boards under the pile only when the surface needs protection or cleanup is hard.
- Split the pile if one face would require more than one long carry route.
The common mistake is staging everything in one giant mound because it looks tidy. It isn’t. A single mound can block access, force the crew to dig from the wrong side, and make the first half of the job smooth while the second half turns into rehandling.
For wet material, staging matters even more. Saturated product compacts, gets heavy, and clings to tools. That means the face of the pile should be short enough that the crew can reach it without climbing it. If the job is in a tight townhome yard, a lower, longer staging strip beats a tall cone every time.
The best staging plan depends less on volume than on shape. A 4-yard pile in the wrong shape can slow a job more than 6 yards staged properly. A flat, reachable face saves more labor than a prettier pile.
Quick check: if the crew keeps stepping around the pile, digging from the far side, or dragging material through finished areas, your staging is wrong.
Which Equipment Fits Which Job?
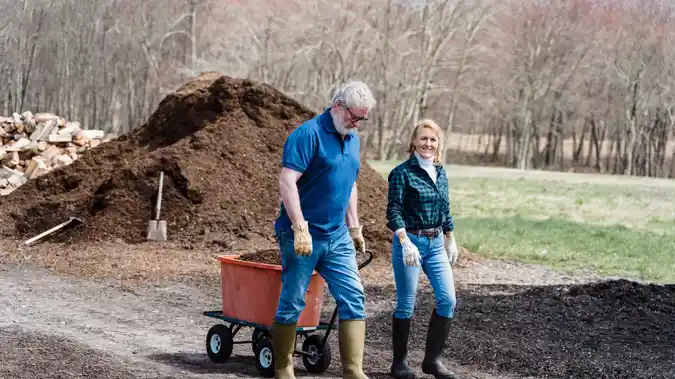
The right equipment is the one that matches access, distance, and the surface you are protecting. If the site can handle a compact loader, use it for the heavy movement; if it can’t, stay with carts, shovels, and staged hand work.
Picture this: you’re on a commercial bed upgrade with broad access, then the next day you’re on a fenced backyard with a 36-inch gate and no room to turn. Those two jobs do not need the same gear. One rewards speed. The other rewards flexibility.
A skid steer, compact track loader, mini skid, wheelbarrow, contractor tub, tarp, and shovel each solve a different problem. A skid steer is good when the site has enough room to move without tearing surfaces. A mini skid can fit tighter paths but still needs a route. A wheelbarrow is slow, but it gets through narrow spaces. A contractor tub or heavy-duty tote helps when you need to move smaller loads cleanly through a house-side corridor.
Here’s the simple split:
- Use a loader when the pile is large and the route is open.
- Use wheelbarrows when access is tight and the carry is short to moderate.
- Use totes or tubs when the surface is delicate and the path is narrow.
- Use tarps when you need a fast drag route or cleanup zone.
- Use shovels and landscape rakes when precision matters at the bed edge.
The trap is buying or renting too much machine for the access you have. A loader is fast, but if you spend 20 minutes moving fence panels and protecting paving, the speed disappears. On the flip side, hand moving everything on a large site can burn an entire day.
Use this test before choosing gear:
- Measure the narrowest opening in inches, not eyeballs.
- Check surface type: turf, pavers, asphalt, gravel, or soil.
- Estimate the longest repetitive carry in feet.
- Match the tool to the carry, not to the pile size alone.
- Keep one fallback tool on site in case the primary route gets blocked.
A good workflow often mixes tools. The truck dumps to a staging point, the loader or mini skid moves bulk, and the final 10 to 20 feet are finished by hand. That hybrid path is usually faster than trying to force one tool to do every job.
Quick check: if your access changes from front yard to backyard, or from open drive to fenced corridor, this is where the plan has to change.
What Changes on Tight, Wet, or Sloped Sites?
The plan changes fast on tight, wet, or sloped sites because traction, turning room, and footing matter more than speed. If the ground is soft or the grade is steep, a workflow that looks efficient on paper will fail in the field.
Picture this: you’re on a rainy week, the beds are muddy, and the driveway slopes toward the house. Every wheel mark shows, every boot print shows, and a pile placed two feet wrong becomes a cleanup job. That is when the normal route stops working.
| Condition | Best Path | Why Other Options Fail |
|---|---|---|
| Wet turf | Stay on hardscape and use hand transfer | Machines rut the lawn fast |
| Steep slope | Stage uphill or at a level pad | Carrying downhill speeds you up, but it increases spill and control problems |
| Tight gate | Use smaller containers and shorter loads | Large tubs and bulky carts jam the route |
| Soft soil | Limit wheel traffic and spread from the perimeter | Repeated passes compact and scar the surface |
| Root-heavy beds | Keep the pile outside the drip line | Heavy staging can damage feeder roots |
If the site is wet, reduce the number of passes. That means fewer trips, smaller loads, and less turning. A tracked compact machine can help, but only if the route is firm enough to support it. If it isn’t, the machine just makes a wider mess.
If the site is sloped, stage above the work when possible so gravity helps move product into the bed. But don’t confuse gravity with control. A loose pile on a slope can slide, spill, or dump too far into the bed. A controlled shovel or small bucket load is safer than a big push.
Use this order on a difficult site:
- Protect the surface first with boards, mats, or a hard route.
- Bring in only the amount needed for the next zone.
- Set the pile where it won’t migrate downhill.
- Move with short, controlled loads.
- Finish the edge by hand to keep the line clean.
- Clean the route before opening the next zone.
The standard advice to “just stage it near the beds” breaks down here. Near is not enough if the site is slippery, soft, or angled. You need a controlled path, not just a close pile.
Quick check: if the ground shows tire tracks, the pile slides, or the crew is losing footing, you are in this section.
How Should a Crew Sequence a Mulch Job?
A crew should sequence a mulch job from access to staging to finish, not from the front yard to the backyard by habit. If you start in the wrong place, you trap yourself behind finished work and force the crew to cross clean areas.
Picture this: you’re looking at three beds, one narrow side path, and a truck that has to leave by noon. The smart move is not “start wherever looks easiest.” The smart move is to build the route so every finished bed stays out of the way of the next bed.
The best sequence usually follows this pattern: protect the site, stage material, rough spread, edge clean, and final cleanup. That order keeps the work moving in one direction. It also prevents the classic mistake where a crew spreads one bed perfectly and then has to walk across it with the next load.
Use this sequence:
- Unload and confirm the dump point before anyone starts spreading.
- Set the first staging pile closest to the first bed in the route.
- Rough spread with shovel, rake, or bucket to get coverage fast.
- Back-check depth and fill thin spots before moving on.
- Edge around trees, downspouts, utility boxes, and hardscape.
- Brush off hard surfaces and collect stray pieces at the end of each zone.
You also need one person to think about access while the others work. On a three-person crew, that can be one person spotting, one person moving material, and one person finishing the bed edge. On larger crews, zone the job so each person knows which strip or bed belongs to them.
The biggest workflow mistake is chasing the prettiest bed first. That might look productive for 15 minutes, but it often forces more walking, more crossing, and more cleanup. Start with the bed that controls the route, not the one that looks easiest to finish.
If the job is large enough to need multiple deliveries, sequence the drops to match the order of the beds. Do not dump everything at once if the last half of the material will sit in the way for hours.
Quick check: if the crew keeps crossing finished work, or if the nicest-looking bed is making the rest of the job harder, your sequence is wrong.
What Are the 5 Mistakes That Waste the Most Time?
The biggest time losses come from poor staging, bad route planning, too many handoffs, wrong equipment, and cleanup left for the end. If you fix those five things, the job usually gets faster without changing the material or the crew size.
Picture this: you’re halfway through the day and the pile is still in the wrong spot, the driveway is dirty, and one person has spent 45 minutes just moving material from place to place. That is not a labor problem alone. It is a workflow problem.
The five mistakes show up again and again:
-
Dumping too far from the work.
Every extra 20 or 30 feet adds walking, turning, and fatigue. -
Staging on the wrong surface.
Soft turf, loose gravel, and planted areas all create cleanup and damage. -
Using the wrong tool for the route.
A loader on a tight site, or wheelbarrows on a huge one, both waste time. -
Spreading before the route is clear.
If the crew still has to move through the area, finished work gets trashed. -
Leaving cleanup to the last 10 minutes.
By then, debris has already been tracked or blown into the wrong places.
The fix is simple, but not easy: make the route part of the job, not something that gets figured out while the pile is already on site. A clear route means the crew can move in a straight line, the pile can stay low, and the last pass is cleaner.
A practical jobsite checklist:
- Confirm the dump location.
- Protect the surface.
- Decide the carry path.
- Assign each bed or zone.
- Move the smallest practical loads.
- Clean as each zone finishes.
The standard advice to “work efficiently” does not help here because it doesn’t tell you where the waste comes from. The waste usually comes from the second touch. If you can cut one touch out of the sequence, you often save more time than switching tools.
Quick check: if the crew is busy but the site isn’t moving forward, one of these five mistakes is usually the reason.
Edge Cases Where the Normal Advice Breaks Down
The normal advice breaks down when access, weather, or site rules change the rules of movement. If the job has one of these conditions, the workflow has to adapt before the truck arrives.
Picture this: you’re dealing with a rooftop terrace, a townhouse with no side yard, or a commercial site with strict cleanup rules. A normal dump-and-spread plan won’t survive those constraints.
-
No place to dump near the beds
What changes: the site has no safe staging point.
What to do instead: bring in smaller loads, use relay points, and stage in sections. Keep a tarp or protected pad for the transfer zone. -
A site with strict pedestrian traffic
What changes: people are moving through the same area all day.
What to do instead: schedule material movement in windows, not all day, and keep one path open at all times. -
Jobs with irrigation heads or wiring at the bed edge
What changes: ground contact can damage hidden components.
What to do instead: hand move the last few feet and avoid heavy staging right on the edge. -
Delivery after rain or before a storm
What changes: traction and cleanup both get worse.
What to do instead: protect the route, reduce load size, and avoid parking heavy equipment on soft ground. -
Mixed hardscape and softscape on the same route
What changes: the surface changes under the wheels.
What to do instead: assign one route for equipment and another for hand carry, even if the second route is longer. -
Very small jobs with lots of detail
What changes: setup time can exceed material movement time.
What to do instead: skip heavy equipment and keep the plan simple with hand tools, tubs, and a compact staging spot.
The mistake on edge-case jobs is forcing the same workflow onto every site. That can turn a minor install into a repair bill. A better plan is to adapt the route first, then choose the tool, then choose the pile location.
Quick check: if the job has no obvious staging area, a busy foot path, or fragile edge conditions, normal workflow advice will fail you.
What Should You Do Before the Truck Arrives?
You should finish the route plan, surface protection, and crew assignments before the truck arrives so the first drop becomes part of the job, not a delay. If you wait until delivery to decide those things, the site starts out behind.
Picture this: the truck pulls up, the driver wants a clear signal, and nobody knows where the pile should go. That dead time costs real labor. A good pre-arrival plan cuts that waste and keeps the job moving from minute one.
Use this pre-arrival list:
- Confirm load size and delivery order.
- Mark the dump point with flags or cones.
- Protect hardscape, drains, and delicate turf.
- Clear the route of hoses, cords, toys, tools, and debris.
- Assign one person to direct the truck and one to manage the first move.
- Set the first bed or zone before the first shovel hits the pile.
A few simple tools make a big difference: cones, stakes, marking paint, tarps, landscape rakes, shovels, a wheelbarrow, and if needed, a compact loader. You do not need fancy gear to get this right. You need order.
The answer is not just prep time; a 10-minute prep walk can save far more than 10 minutes on site. It also lowers the chance of dumping in the wrong place, crossing finished work, or blocking access for the next delivery.
The truth is, most mulch jobs do not fail at spreading. They fail at receiving. Once the pile lands in the right place and the route is clear, the rest is usually standard field work.
Quick check: if the truck is still your first point of planning, you are not ready yet.
What Materials and Standards Matter Here?
The most useful standards are the ones that keep the workflow clean and the site protected, not the ones that sound impressive. If you want a reliable setup, use real site-control basics and fit the material to the route.
Picture this: you’re balancing jobsite flow, cleanup, and protection on the same property. That means your choices need to hold up to foot traffic, vehicle traffic, and weather. The path matters as much as the product.
For surface protection and site control, the National Association of Landscape Professionals and the American Nursery & Landscape Association both publish industry guidance worth reading, and OSHA guidance on walking-working surfaces is useful when a jobsite has slope, debris, or trip hazards. If you need a safety baseline, start with those organizations rather than guessing.
Two practical rules help more than a long manual:
- Keep the route visible.
- Keep the route short.
If a route has to cross pavers, turf, or a narrow gate, think about weight, turning radius, and cleanup before you think about volume. A material that is easy to unload can still be hard to manage if the access is poor. A material that arrives dry can still be hard to move if the pile shape is wrong.
Use a standard that fits the job:
- Hardscape protection when the surface is finished and clean matters.
- Route separation when people and equipment share space.
- Zone staging when the site is too large for one pile.
- Hand finish where detail is visible at the edge.
The wrong move is treating every yard like a blank field. Real jobs have hoses, edges, drains, and setbacks. The workflow has to respect those constraints or the crew spends time fixing avoidable damage.
Quick check: if your site has finished surfaces, public walk paths, or slope, you need a protection-first workflow, not just a pile-and-spread plan.
FAQ
How far should mulch be staged from the beds?
It should be staged as close as the site allows without blocking the route or damaging the surface. If the pile forces extra crossings, damaged turf, or awkward turning, it is too close in the wrong way. A slightly longer carry can be faster than a bad staging point.
Is a skid steer always better than wheelbarrows?
No, a skid steer is only better when the site has enough room and the surface can take it. On tight or soft sites, wheelbarrows, tubs, or hand carries often work better because they create less damage and fit narrower access. The job decides the tool.
What is the biggest cause of wasted time on mulch jobs?
Poor staging is usually the biggest time sink. If the pile sits in the wrong place, every load turns into extra walking, extra turning, and extra cleanup. Fixing the dump point often saves more time than changing the spread method.
Should the pile be dumped all at once or in sections?
Dump it in sections when the site is large, the route is constrained, or finished work would block later movement. One big pile is fine only when it can be reached and moved without rehandling. If not, sectioning keeps the job from choking itself.
What if the jobsite is wet after rain?
Use smaller loads, protect the route, and keep equipment off soft ground as much as possible. Wet sites rut easily, and cleanup gets harder fast. If footing is bad, hand transfer and short staging runs are safer than trying to power through with heavier equipment.
Drafted with AI; not yet reviewed by a person.
Leave a Reply